 Tweet
Tweet
ASALAM-O-ALIKUM:haey:
Hope u all are fine wid the grace of ALLAH n enjoying RAMADAN BLESSINGS.
Today i want to share my ever 1st tutorial not only on PG bt on any forum... im not so expert so i request GUL sis n RIDA sis to point out my mistake if they find so i make them correct.Lets get started with the name of ALLAH....
step1:
Open a new document with a white background. Mine is
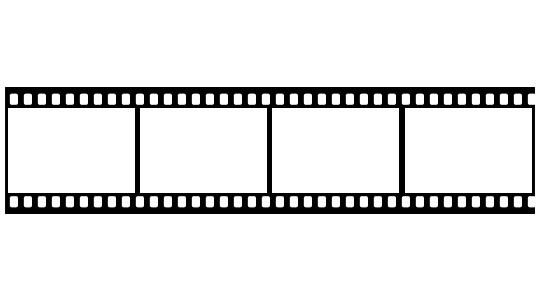
choose Rectangular Marquee tool by simply pressing the M key on your keyboard, then on the main stage drag out a nice long rectangle like the one below. Foreground and background colors should be in black and white,press " Alt-Backspace" to fill the selection with black. Press "Ctrl-D to deselect the area

step2:
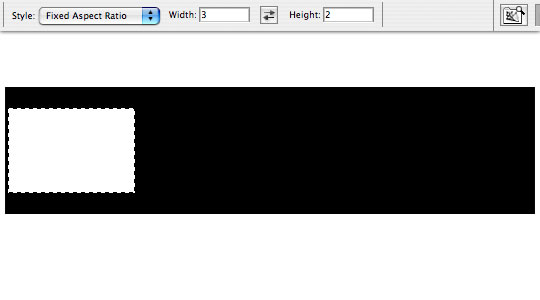
Next we need to delete the area where the photos will be placed.select the rectangular marquee tool choosing "Fixed Aspect Ratio from the Style drop down and then by setting the ratio to 3 Wide and 2 High.With the tool set, go ahead and drag out the first opening as shown below and press the Delete (PC: Backspace) key to remove the selection.
step3:
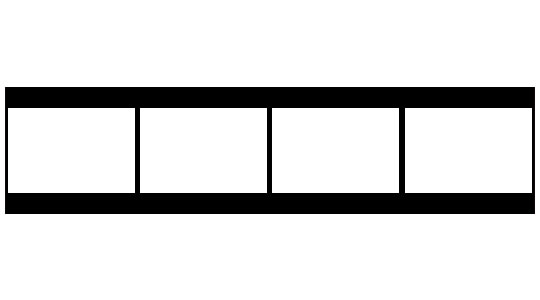
With the selection still active, move the rectangle to the right and remove the remaining frames. Holding down the Shift key while dragging the selection will keep it aligned horizontally or you can move the selection using the arrow keys on your keyboard.
(*note: holding the Shift key while using the arrow keys will move the selection 10 pixels at a time.)
When all the sections have been removed press " Ctrl-D" to deselect.
Hope u all are fine wid the grace of ALLAH n enjoying RAMADAN BLESSINGS.
Today i want to share my ever 1st tutorial not only on PG bt on any forum... im not so expert so i request GUL sis n RIDA sis to point out my mistake if they find so i make them correct.Lets get started with the name of ALLAH....
step1:
Open a new document with a white background. Mine is
choose Rectangular Marquee tool by simply pressing the M key on your keyboard, then on the main stage drag out a nice long rectangle like the one below. Foreground and background colors should be in black and white,press " Alt-Backspace" to fill the selection with black. Press "Ctrl-D to deselect the area
step2:
Next we need to delete the area where the photos will be placed.select the rectangular marquee tool choosing "Fixed Aspect Ratio from the Style drop down and then by setting the ratio to 3 Wide and 2 High.With the tool set, go ahead and drag out the first opening as shown below and press the Delete (PC: Backspace) key to remove the selection.
step3:
With the selection still active, move the rectangle to the right and remove the remaining frames. Holding down the Shift key while dragging the selection will keep it aligned horizontally or you can move the selection using the arrow keys on your keyboard.
(*note: holding the Shift key while using the arrow keys will move the selection 10 pixels at a time.)
When all the sections have been removed press " Ctrl-D" to deselect.

Comment