A quick Photoshop tutorial on the making of an interesting clouds text. Actually, we can make not only the text, but different shapes to. It is very interesting effect for me.
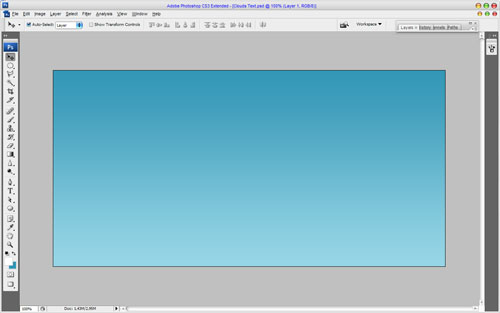
Start with creating a new document sized px, after that select some appropriate colors, for example colors of #3497b6, #97d5e6 and drag a linear gradient.
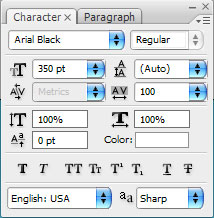
Ok, then type the text using the Horizontal Text ToolArial Black font, that comes with Windows. Use following presets for current text layer:
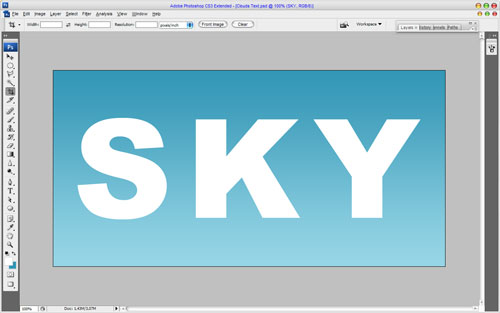
You can see the result on my screenshot below.
Good, time to create clouds background. Select theCLOUD Brush Tool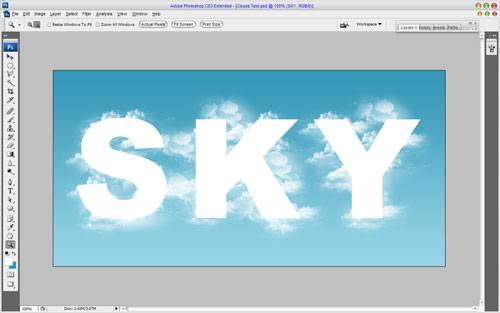 Ctrl+Shift+I to invert selected area and clear it with pressing Delete button. Deselect chosen area with Ctrl+D.
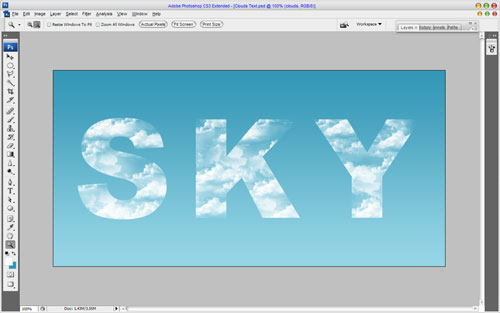
After that get out the Eraser Tool and a soft round brush and make sharp letters borders softer.
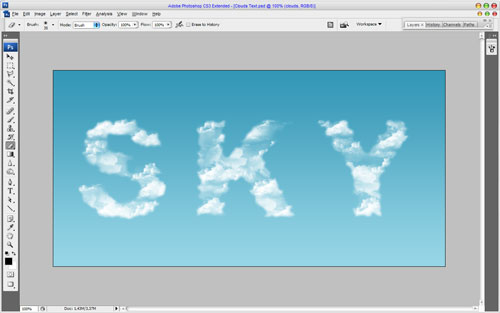
Ok, select the Brush Tool again and add a couple of small size clouds more to bring our letters more realistic view.
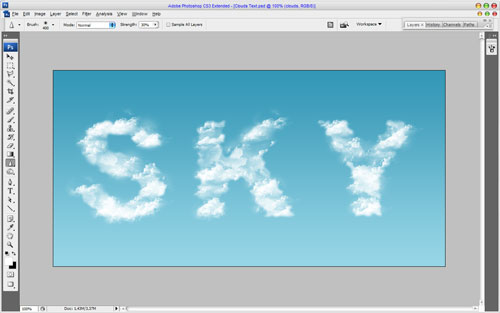
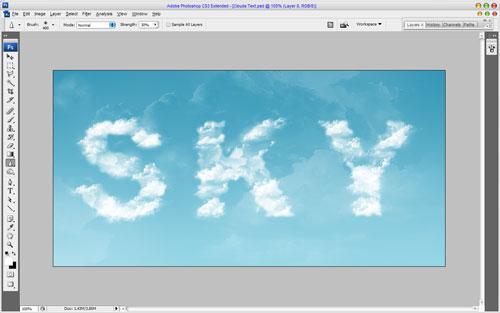
We are done! Thanks for reading this tutorial everyone, I hope you enjoyed it! Please feel free to experiment not only with text. Also you can create different shapes.

Start with creating a new document sized px, after that select some appropriate colors, for example colors of #3497b6, #97d5e6 and drag a linear gradient.

Ok, then type the text using the Horizontal Text ToolArial Black font, that comes with Windows. Use following presets for current text layer:

You can see the result on my screenshot below.

Good, time to create clouds background. Select theCLOUD Brush Tool
 Ctrl+Shift+I to invert selected area and clear it with pressing Delete button. Deselect chosen area with Ctrl+D.
After that get out the Eraser Tool and a soft round brush and make sharp letters borders softer.

Ok, select the Brush Tool again and add a couple of small size clouds more to bring our letters more realistic view.


We are done! Thanks for reading this tutorial everyone, I hope you enjoyed it! Please feel free to experiment not only with text. Also you can create different shapes.


Comment