 Tweet
Tweet
4 fast ways to trim the size of your mailbox
I get busy working, and I never really pay attention to the size of my mailbox. That is, until I get a nasty little reminder from the system administrator saying I'm over the limit and need to delete some mail.
In hopes of changing my ways, I've decided to take a more proactive approach about managing my mailbox size. Here are a few things I've learned.
Who sets the limit?
First off, if you store your e-mail on a server, like a Microsoft Exchange server, your limit is probably set by a system administrator. Your Internet Service Provider (ISP) may also set a limit. The size limitations vary greatly, and can be anywhere from 1 megabyte (MB) to 90 MB or more. The consequences of reaching the limit are also subject to that administrator or ISP. They may send warnings, limit functionality, and at some point you may not be able to send or receive mail.
What exactly determines mailbox size?
Your main e-mail folder is the Inbox. That's where e-mail gets delivered. Your Inbox is located inside of your mailbox along with the other folders, such as Drafts and Sent Items, which are created by Outlook to store information. Knowing how much space is being taken up by these folders is your first step towards keeping your mailbox trim.
To check the size of your mailbox in Outlook 2003:
- On the Go menu, click Folder List.
- In the Navigation Pane on the left side of the screen, click Folder Sizes.
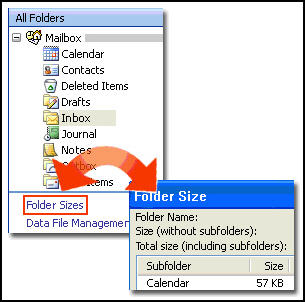
You can now see the sizes of your mailbox and the e-mail folders inside it. Likely suspects for mailbox "bloat", besides your Inbox, include Deleted Items, Drafts, Outbox, and Sent Items. Boy, my mailbox definitely needed a trim!
4 quick ways to trim your mailbox right now
Tip 1: Look for the largest messages first and delete them
I never knew there was a way to group messages by size. This is handy because when you get those nasty administrator messages, you can probably delete a few of the largest messages, instead of wading through many smaller ones.
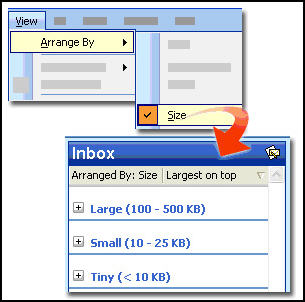
To group your e-mail messages by size:
- 1. On the View menu point to Arrange By and click Size.
- 2. Make sure Show in Groups (also on the Arrange By submenu) is selected.
- 3. Your messages will be sorted into groups such as Tiny (< 10 KB), Small (10 - 25 KB), and so on.
- 4. Delete messages marked "Large" first (or save the attachments elsewhere, see Tip 3 below) to make the greatest difference to your overall mailbox size.
Tip 2: Empty your Deleted Items folder
Every time you delete an e-mail message, it goes into the Deleted Items folder. Since you probably meant to get rid of these deleted items in the first place, permanently tossing them out is a painless way to cut the bulk.
To delete these messages automatically, use the Empty the Deleted Items folder upon exiting setting.
To use the Empty the Deleted Items folder upon exiting setting:
- On the Tools menu click Options.
- In the Options dialog box, click the Other tab.
- In the General section, click the Empty the Deleted Items folder upon exiting check box.
- Click OK.

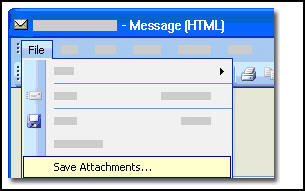
Tip 3: Save attachments outside your mailbox
Attachments take up lots of space. I've started saving them to a location outside my mailbox. To do this, on the File menu click Save Attachments while you have the e-mail message open.
Tip 4: Archive your Sent Items folder regularly
Generally, a copy of each message you send is stored in your Sent Items folder. It's easy to forget about this, and like me, you may end up with a huge Sent Items folder. Since you probably don't need to track each and every item you send, you can either delete these messages or archive them.
To specify archive settings for AutoArchive, right-click the Sent Items folder, click Properties, and select the AutoArchive tab.
To archive manually, on the File menu click Archive and scroll to select the Sent Items folder.
The steps above are a good start, but there's a lot more you can do in terms of ongoing mailbox management. It's a good idea to regularly archive your messages, not just in your Sent Items folder, but in your entire mailbox. Also, you may want to check out the Mail Cleanup Tool.

Comment